Glenda Irene Green’s Devilish Eggs

GlendasDevilishEggs

Glenda writes: “I do not have an eggsact recipe, but I add, taste, ya know…

To the egg yolks I add mayo, good brown mustard, finely chopped onion or shallots, finely chopped dill pickles, pickled juice, avocados, salt & pepper to taste. Can add wasabi, jalapenos, and cayenne for heat and a different taste. When not decorating, I usually sprinkle paprika over top.

For the decorations we used sliced black olives, red pepper, capers, rosemary, chives, carrots. The avocado definitely makes the eggs yummy.”

Thanks Glenda. Your devilish eggs are the most exciting I’ve ever seen.

Posted in Recipe | Tagged , | Leave a comment

I don’t like liver

plateo'liver

But I love Foie Gras. We had dinner at Restaurant Eve in Alexandria Virginia last weekend and we did the tasting menu. The first course offered “Terrine of Foie Gras with Virginia Blackberries, Lemon Verbena and Blackberry Roll” and it was divine. The Blackberry Roll was a short pastry with a house-made preserve. I always order Foie Gras when it’s on the menu not only to reward an establishment for a bold menu choice, but because I rarely find myself in a place that would serve it.

Growing up, Mom served liver and I just never got used to that livery taste. Even chopped liver, which was a staple at any special event or holiday meal, just did not appeal to me…that is until I went to a company holiday party at Texas French Bread back in the day and Jeanine served me chopped liver — and I loved it. She sautéed apples with the aromatics and deglazed with cognac, adding the sweetness that balanced out the metallic taste I hated. It was a wow moment and from that time on I have developed a taste for a well prepared liver mousse and ultimately, when I grew to afford it, the foie.

My wife Kim likes liver and when I get a bird with a liver in it, I’ll often cook it up for her as a special treat. This weekend I was shopping and decided to get a container of chicken livers, which was obviously too much for one person to eat at a single meal. Kim suggested that I make something we both would like and mentioned chopped liver. That’s when the disembodied spirit of Jeanine Kearney spoke to me from the distant past and said “it’s the fruit, stupid!”

I started with a shallot sautéed in olive oil and butter. When I reached for an apple, I found a Bartlett pear which had a few bruises and was on the edge. It seemed like a frugal move to use it, so I diced it up and readied it for the pan. When the shallots were translucent, I deglazed with an amontillado sherry, added the livers and the pear, and cooked it on medium high until the livers were done and the pears were soft. While this was cooking, I remembered my mom liked to add good Hungarian paprika to her chopped liver,  so I put a goodly amount in with the salt and pepper.

After cooling down a bit, I put it into the food processor and added a piece of rustic bread to soak up moisture and add a little body. Whirrrrr – taste – a little bit of salt and pepper and wowie zowie! This one really worked. Kim and I munched on it warm with matzoh and put the rest in the fridge to set. When I got home from work today it was the first thing out of the fridge for a snack.

The mousse reminded me of the Restaurant Eve foie gras terrine that was served with theblackberry. I also flashed on a liver mousse that I had recently that was served with a wine jelly. So I added a dab of raspberry apricot jam to the mix and it bumped it up a notch. Then I added some hot bread and butter pickles from our friends Jim and Marianna, as Emeril would say, it juked it up notches previously unknown to mankind.

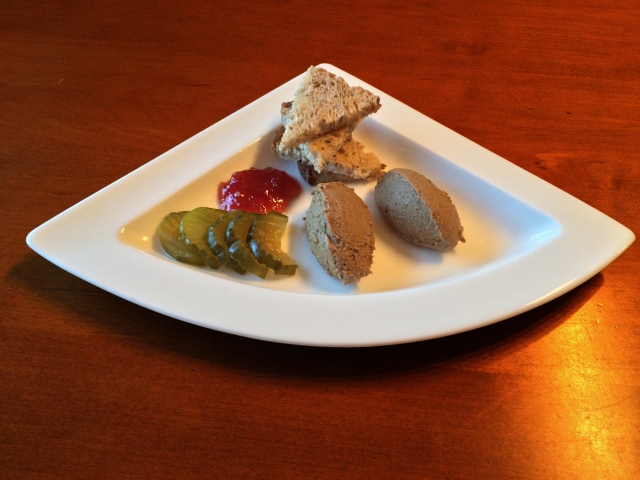
So here it is, my Chicken Liver Mousse with paprika and pears, served with toast points, raspberry apricot preserves and hot bread and butter pickles. I think we just ruined our dinner trying to get the perfect bite.

biteo'liver

Posted in Recipe | Tagged , , , , , | Leave a comment

Pamela’s Pancakes

abbyeats_600pxAfter two months of living in temporary housing while my husband packed up our house in New Hampshire, we have finally made the big move to Pittsburgh. I haven’t cooked more than a couple of fried eggs since November and that’s been one of the most difficult things about this transition. However, there are some amazing restaurants and intriguing local delicacies here and I’ve barely scratched the surface of the great dining this city has to offer. After a week of packing, moving, cleaning, selling our house, driving and stressing out about all of it, we woke up on our first morning in our new home surrounded by boxes with no food in the fridge. I hadn’t even unpacked the coffee pot yet. It was Saturday and it was early, but we were hungry and in dire need of a hot cup of joe. We rubbed the sleep from our eyes, got dressed and ventured out.

Breakfast can be a deceivingly difficult meal to get right. Most people are very particular about how they like their eggs prepared and they are easy to mess up. Twenty seconds too long on the heat and over easy eggs become hard cooked. It takes a deft hand to make perfecly fluffy pancakes and moist french toast. Finding a great breakfast place is like striking gold. We were never happy with our breakfast choices in Concord, NH so I’ve been particularly excited about finding a few good diners and coffee shops here in our new hometown. During my first couple of weeks here, someone took me to lunch at a place called Pamela’s down in the Strip District. They had excellent sandwiches and salads and the decor was kind of 50’s retro with a diner-like atmosphere. I also noticed that they serve breakfast all day. I thought I might have struck that illusive breakfast gold. Pamela’s has a couple of other locations, including one in Squirrel Hill, which is very close to where we live. That’s where we headed on our first Saturday morning in Pittsburgh.

Apparently, this location is almost impossible to get into for Sunday brunch. But on Saturday morning, we walked right in and found a cozy booth in the back. Almost immediately, large cups of hot coffee arrived at our table and we examined the menu. They had excellent looking egg dishes, pancakes with fruit and whipped cream, omelets, french toast and most of the usual things you’d see on a breakfast menu. They also had some interesting variations, like french toast made with a croissant, malted waffles and something called Lyonnaise potatoes. Jason ordered scrambled eggs mixed with cream cheese and scallions served with the Lyonnaise potatoes. I ordered crepe hotcakes with a side of bacon.

pancakesIt only took a few minutes for our breakfast to arrive. Our eyes bugged slightly when the plates went down on the table. My crepe hotcakes occupied the entire plate! Jason’s breakfast looked delicious, the eggs decorated with small dollops of cream cheese and sprinkled with scallions. The Lyonnaise potatoes were soft homefries in some kind of creamy sauce, sort of like chunky mashed potatoes au gratin. It all looked delicious and we gratefully tucked in. The crepe hotcakes were sublime. They were thin yet fluffy and the butter and syrup kind of floated on top and barely soaked in without making the hotcakes soggy.
pancakes 2The most remarkable thing was the crispy edge that surrounded each hotcake, creating a halo of crunchy texture that was absolutely irresistable. I ate half the plate of hotcakes and was stuffed, but I could not leave those crispy bits behind. Jason had a few bites and together we almost finished the whole plate of hotcakes.

We went straight home after breakfast, climbed right back into bed and took a mid morning nap. I dreamed that I was sleeping under a blanket made from Pamela’s crepe hotcakes, warm and comforting with delicate pools of melted butter and syrup glistening on the surface, pulled up to my chin so I could nibble on the crispy edges when I awoke. We’ll most certainly return to Pamela’s for breakfast, for more crepe hotcakes and some of their other offerings. It was truly KILLER DELICIOUS.

Posted in Restaurant Review, Uncategorized | Tagged , , , , , | Leave a comment

Short & Sweet

August 15th was Julie Child’s 100th birthday and there was quite a bit of media attention paid to her contributions to the world of American cooking. For weeks, I was thrilled to find re-runs of old Julia Child cooking shows on my favorite TV networks. As I thumbed through cookbooks and contemplated what my next baking project would be, I turned to Julia for inspiration. As if by magic, I discovered that our local public television station was planning to re-air several episodes from the very first season of The French Chef from 1963. When I checked the listings for more information, I found that one of the episodes in the schedule was about making quiche, an egg custard pie. Eureka! Divine inspiration! Julia was making a short dough! This was a sign that I needed to make my own pie crust.

My mother made her own pie crusts and I’d made them myself when I was very young. But once they became available pre-made in the grocery store, that was the end of my pie crust making days. When I asked my husband’s 90 year-old grandmother, a pie maker from way back, what her favorite recipes and techniques were, she said “I haven’t made a pie crust in years. Quite frankly, I can’t tell the difference between home-made and store bought. Its so much easier to just buy them and they taste perfectly fine”. Still, what kind of baker would I be if I couldn’t master something as simple as a pie crust? I had to carry on with my plan.

On the evening of the broadcast, I hundered down in front of the television with a pen and paper and I wrote down Julia’s ingredients and instructions. In some of my past research, I’ve noted that pie crusts made with butter have excellent flavor but are not as tender and flaky as those made with shortening or lard. Julia’s answer was to use both. Her recipe called for 2 cups of all purpose flour, 1 stick of butter and 3 tablespoons of vegetable shortening. Into the flour, she put a pinch of salt and a teaspoon of sugar. She cut the butter into small pieces and put them into the freezer for a couple of minutes before starting the recipe. The shortening she left at room temperature. She also had a small jar of ice water standing by for the completion of this recipe. I decided to make my pie crust exactly like Julia did without the help of a food processor or mixer. I followed her instructions to the letter.

When making any short dough, which is what a pie crust is, its very very important that all the ingredients be as cold as possible. The butter or shortening is crumbled into the flour and remains suspended in the flour in small pieces. As the crust bakes and the fat melts, layers are created in the dough and the result is a crust with flaky texture. My butter was ice-cold when I started the preparation. By hand, I crumbled the butter and shortening into the flour, working it between my fingers until it resembled rough cornmeal. Then I started adding ice water a tablespoon at a time until the dough started to come together and form a ball. Julia added about 5 tablespoons of ice water but I didn’t want my dough to be too wet. I added about 4 tablespoons and my dough was coming together, so I balled it up, placed it in a sheet of waxed paper and put it in the fridge for half an hour to rest.

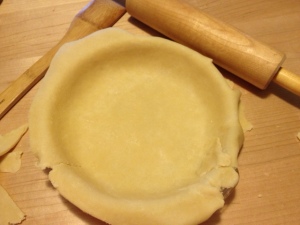
When I took it out, it looked kind of dry and crackly. And when I tried to soften it up so I could roll it out, it started crumbling. Obviosuly, my dough was too dry. And since it was chilled and hard, it was challening to try and work more water into it. I worked it like a piece of clay, adding little bits of water and kneading it in my hands until I could manipulate it without it crumbling. But then another concern occurred to me. Since I just kneaded this dough, the strands of gluton in the flour were more developed and my pie crust might end up being hard and tough instead of tender and flaky. In the spirit of expermintation, I told myself that the proof of the pudding is in the eating and I pressed on. I rolled out my dough to about an eight of an inch in thickness and placed it into the pie plate. I cut off the excess dough and fluted the edges and my crust was ready to be filled.

My filling of choice for this crust was a pecan pie, which requires the crust to be pre-baked or “blind baked” before it gets its filling and final baking. This process entails baking the crust for about 20 minutes with some kind of weight inside it to keep it flat while it sets up. I have a jar of beans that I’ve been using for years for this very purpose. My oven was pre-heated to 400 degrees and I pricked the bottom of the pie crust with a fork a few times, just to make sure any air escaped during baking, which keeps the crust from rising up on the bottom. I lined the inside of my raw pie crust with foil, poured the beans in and pressed them gently up the sides of the crust to insure that it wouldn’t slide down when it went into the hot oven. I put my crust into the oven while I prepared the filling.

20 minutes later, the crust was starting to brown and it was set up enough to take out, fill and put back into the oven. The pie took about 40 minutes to bake. And it came out picture perfect. But as the old saying goes, the proof is in the eating. Unfortunately, I was correct in my assumption that the extra kneading would result in a tough pie crust. The bottom of the crust was tender and lovely. But the sides of the crust were a little hard and kind of diffitult to chew. I learned a good lesson with this project. Next time, I’ll know exactly what to do to turn out the perfect pie crust.

Posted in Baking 101, Recipe, Uncategorized | Tagged , , | Leave a comment

Rolling in the Sourdough

I am on a quest to learn how to bake properly, specifically, to learn how to make bread. So when my husband told me that there was a beginners sourdough class going on through my local community education program, I signed up. I took a Chinese cooking class through this program last year and I loved it. This sourdough class was right up my alley. I was really excited to have someone answer my questions and show me the ropes of making sourdough bread.

I arrived a few minutes late with my prescribed materials – a large mixing bowl, wooden spoon and two containers for taking home some of the sponge. The class was small, only a dozen people, and we were all at different skill levels. Our teacher, Laury Nichols, was charming, energetic and quite funny and she started us out with the very the basics. She chatted as she raced around the kitchen classroom getting all the ovens heated up and ingredients ready. Laury’s goal was to teach us how to bake without a recipe. She showed us a huge array of cookbooks, all illustrating slight variations of the same recipes. And her words struck me like a lightening bolt: “Making bread is an ancient practice. Illiterate people have been baking for centuries without the benefit of a written recipe. If they can make bread, so can you”. Laury was playing my song I was ready to sing and dance.

Laury explained that any bread made from a sponge is considered sourdough bread and that it doesn’t always have that sour flavor we associate with classic sourdough. She discussed how bread was made before the invention of instant yeast. I didn’t realize it, but yeast is everywhere. It occurs naturally and lives on all manner of plants, fruit and vegetation. Yeast is actually in the air around us! In ancient times, flour was mixed with water and whatever naturally occuring yeast was around would find this mixture, land in it, eat it and create it’s gassy bi-products, which would cause the mixture to froth and bubble. That is how bread, beer and wine were made for centures. In fact, when you see wine grapes with a white dust on their skins, that is naturally occuring yeast. In the 1800’s, some crafty German developed a manufacturing technique that created dried, granulated yeast and thanks to his ingenuity, we have a much improved route to starting our own sponge.
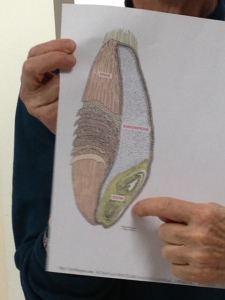
Laury showed us what a wheat grain looks like and explained the different parts, such as the bran and the germ. She showed us different kinds of grain that are also used to make flour, like rye and barley. Each grain produces very different flour that yields very different textures and flavors in the bread. Laury also brought an assortmant of bread she’d made, some with dried fruit mixed in, some covered with sesame seeds and some marbled with dough that had been mixed with molasses. We tasted this variety of breads as she talked.

After our extensive lesson, we were ready to get our hands dirty. We started with the sponge, which is just flour, water and yeast allowed to sit in a warm place and become active. Laury had two bins of sponge, one made with white bread flour and one made with whatever remnants she’s scraped into the bowl. She’d had one bin of sponge for months and every time she made bread, she’d add more flour and water to the sponge to give the yeast something to eat. She referred to this as “feeding the sponge” and I imagined bakers in ancient times with a bowl of sponge in their homes that they dipped into each day to make fresh bread for their families. Laury spooned gooey blobs of sponge into our bowls. We added a little warm water to the sponge and then started mixing in handfulls of flour until it was the consistency of pudding. Laury instructed us to turn our dough out onto our plastic trays that she had dusted with flour. As we began working our dough, we added more flour and when the dough was firm enough, we started kneading. She walked around from table to table and sprinkled salt on our dough as we worked it. Everyone had their own technique for kneading, but the idea is to elongate the dough, creating stretchy strands of gluten that give your bread a chewy texture. When pizza makers throw their dough into the air, that is a form of kneading. When we were done kneading, we cut pieces of dough off and formed a couple of small doughballs. One was patted down into a disc and set aside to rise for its final destination as an english muffin. The other was turned into a small pizza crust, topped immediately and placed in a 400 degree oven.

We shaped our final pieces of dough however we wanted to and set them all aside to rise while Laury finished her lesson. We asked many questions and Laury was gracious and adept at answering everything. I learned that yeast likes a warm environment, about 75-80 degrees, and when its exposed to cooler temperatures, it goes dormant. I learned that the sponge becomes a starter when flour is added and the mixture is allowed to sit refridgerated for many hours, sometimes overnight. I learned that a piece of dough can sit in the fridge for a very long time before it goes bad. The way to tell when a starter has gone bad is to look for green or pink streaks. If there is liquid sitting on top of the dough, that is simply waste from the fermentation process and can be poured off and the dough is fine. When our mini pizzas were done, we munched as Laury talked. Then Laury took us over to an electric skillet that she’s sprikled with cornmeal. The english muffins were placed in the skillet and when they were browned on one side, Laury flipped them over and cooked the other side. Finally, we put our loaves in the oven and baked them while we cleaned up. Everyone went home with two containers of sponge.

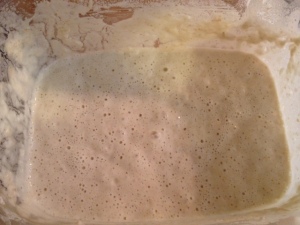
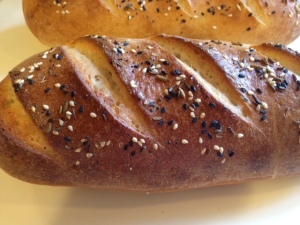
When I got home, I fed my sponge a little flour and water and set it on the counter. But the weather turned rainy and chilly and after a couple of days, my sponge looked runny and sad. My yeast was inactive. At the end of the week, I wanted to experiment with sourdough bread, but I needed to wake that yeast up. So, on Friday evening, I added a little more flour and water to the sponge and broke out my heating pad. I turned it on high, covered it with a towel and set my tub of starter on it. A few hours later, my yeast was starting to wake up. I turned off the heating pad before I went to bed and turned it back on the next morning. By midday, my yeast was bubbling. So, I decided to give it a shot and I made my first loaf of bread without using a recipe. I let it rise for about an hour before I baked it. But the final product was less than desirable. It had the texture of playdough and it was kind of rubbery and tasteless. I also realized that I’d forgotten to add a little salt to the dough before I baked it. I was not happy but I knew what went wrong. I didn’t give my dough enough time to rise and it wasn’t in a warm enough place. So the next day, I started over. I ladled a cup of the sponge into my mixing bowl and covered it with three cups of flour and 2/3 of a cup of warm water. I also added just a touch of sugar and a pinch of salt for flavor. These were not exact measurements, I just used the measuring cup as a scoop. I used my Kitchen Aid to knead the dough for about 15 minutes. It was a sticky dough, but it felt plaible and bouncy and smooth, like some of my past bread dough. It felt right, so I used my own intuition and moved forward. I turned my oven on very low – 170 degrees – and set the dough in an oiled bowl. I covered it with plastic wrap and set it near the oven vent to rise. I gave it three hours to rise and when I came back from running errands, it had tripled in size. Eureka! I’d made bread without a recipe. I formed into two loaves, gave it another 30 minute rise, then painted the top with egg wash, sprinked it with a mixture of seeds, slashed the top and cranked the oven up to 500 degrees. Thirty minutes later, I had two fabulous loaves of bread with that slightly sour flavor that you expect to find in a sourdough loaf. This was a giant leap forward. When I was done with my baking, I fed my sponge and set it on the counter with the knowledge that I will use it to make many more loaves of delicious sourdough bread. I have become a baker!

Posted in Baking 101, Uncategorized | Tagged , , , , | Leave a comment

The Man Behind The Curtain

Truth be told – I am an evangelist for Cooks Illustrated magazine. If you’re not familiar with this culinary publication and it’s companion public TV show America’s Test Kitchen, I strongly suggest you check them out. Whether you’re an experienced cook or a complete novice, I guarantee you will find useful information in just about every article you read or episode you watch. I am such a die-hard fan that my husband had a special frame made for me so I can display the artwork on the back of each magazine and still be able to keep the magazine in tact and pull it out when I need to. Each panel of this custom frame has a door on the front so I can switch the magazines out when I want to use the recipes. I have a five-year collection of Cooks Illustrated magazines and I flip through them frequently.

As a media company, these folks follow a philosophy and mission to help educate the home cook about how to create delicious and beautiful food by debunking the mysteries and taking some of the guesswork out of the process. They experiment with recipes, techniques, products and equipment and make recommendations based on their exhaustive research and the results of their thorough testing. I have absorbed an immeasurable quantity of information from reading this magazine and watching this television show. No matter how good I think my cooking is, I always find some tip or suggestion that makes my preparation just a little bit better. And even when I disagree with their conclusions, I respect the process they’ve employed for testing every variable.

When I learned that America’s Test Kitchen was rolling out a public radio version of their television show, I got extremely excited. You see, I work in public radio. Being such a huge fan, I figured my feedback might be helpful as they begin developing this new venture. Since the first of this year, they’ve been producing pilot shows and asking a group of people like me to help guide their production. I found out who was responsible for producing this new show and I inserted myself into the process.

Last week, this group of public radio programming folks were invited to Boston to spend the day at America’s Test Kitchen, meeting their staff, getting a behind-the-scenes look at how they make their magic happen and offering feedback on the programs they’ve produced so far. The gathering started the night before with a private dinner at one of Boston’s most exclusive restaurants Menton, a five-star five-diamond establisment. As the group filtered in, we were greeted by Christopher Kimball and Bridget Lancaster, the stars of America’s Test Kitchen. Christopher is the creator and guiding force behind this small yet mighty media empire. Bridget is an on-camera test kitchen expert whose charming personality and excellent skills make the TV show so inviting. I have to admit, I was a little star-struck and tongue-tied by meeting a couple of my culinary heroes. But half way through a glass of fine single-malt scotch and a great conversation about baking bread, I relaxed a little bit and was ready to enjoy an amazing dinner.

After scrumptious tidbits of steak tartare on tiny potato chips, mini lobster BLT’s and bacon-wrapped dates with blue cheese, we sat down to dinner. My first course was a beet salad playfully constructed on the plate with little seeded tuiles, petit segments of citrus and little dollops of goat cheese. Each bite was a perfect marriage of flavors and textures, the sweetness of the beets, the tangy pillows of goat cheese and the delicate, savory, crispy wafers of the tuile. For my second course, I had a perfectly cooked medium rare piece of ribeye steak. I could see the thin ribbons of fat lacing through this lucious section of beef and each tender slice delivered a burst of beefy flavor. It was served with pieces of caramelized spring onion and a potato and cheese puree that was rich, starchy and creamy. These sides were a great backdrop for the beef, adding texture and flavor without taking over the focus of the dish. I was tempted to lick the plate. For dsessert, I ordered a chocolate tart. I’m not completely certain what each component on the plate was, but they were all delicious. The chocolate tart had a hard shell filled with decadent mousse and a dark chocolate layer on top sprinkled with sea salt. Nestled on the side was a scoop of rich vanilla ice cream resting on a pile of what tasted like malted chocolate powder. I’m not sure I have the words to decribe the sumptiousness of this dessert. I floated home on a cloud that night, filled with anticipation for the next day’s adventure.

The following morning, I arrived at the test kitchen facility in Brookline brimming with optomism. It’s almost impossible to find, tucked away in a quiet area of the Boston suburb in an unmarked building.

Chris Kimball invites us into the test kitchen

The top floor where the magazine is produced is a warren of offices and cubicles.We gathered at a huge wooden table and Christopher explained how the editorial process works, ideas circulated around that very table, debated, argued, assignments made and updates shared. The morning began with coffee and blueberry buckle, prepared by the test kitchen chefs. We discussed the agenda for the day, the made our way down the spiral stairs to the level where the actual test kitchens live.

So, this is where the magic happens – on the lower level of this unassuming building. It does not look at all like it looks on TV. I imagined a slick, spacious studio setting, with lots of room for video cameras and high-tech lighting. But this is a working kitchen, with rows of cooktops and counters lined with ovens and sinks along the walls. It was buzzing with activity, every cooktop was being occupied, every bit of counterspace was being used to test some gadget or tool and a still photographer was moving a stepladder around so he could get good shots of the various stages of different dishes. We were ushered to a countertop where multiple preparations of pumpkin bread were layed out for us to taste. Our group gathered around and piled slices of each sample on our plates, then tasted and discussed the merits and shortcomings of each pumpkin bread. As we moved through the kitchen, were introduced to test cooks who were preparing duck confit and potato latkes and testing rolling pins and wooden spoons. We met with a young lady who was testing blenders by using them each to crush ice. She had a decible meter that she was using to measure how loud each blender was. She explained how long it will take (months) to complete this test and how many different experiments these blenders will be put through before they can be properly rated. As we moved along through the kitchen, the journalistic process that is employed every day to publish this magazine became clear to me. Sometimes a recipe will be prepared fifty times with slight variations each time to see how it effects the final dish.

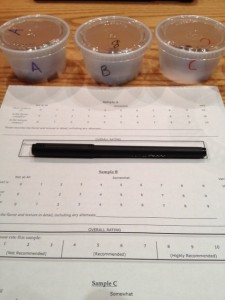
After the tour of the kitchens, we went back upstairs to the big wooden table, where we were presented with a tasting of dark chocolate and invited to go through the same process that their staff goes through when they rate products. We tasted each sample in silence and wrote down our observations on the same form they use. We spent the next hour and a half offering our feedback on the radio show and talking about how the mission and philosophy of Cooks Illustrated translates into the presentation of audio content for a public radio audience. It was a brisk exchange of expertise and I have a new-found appreciation for the work that these smart and focused people do every day. Finally, even though we ate at each stop throughout the morning, we finsihed our meeting with a late lunch at a local eatery. Once again, I floated home feeling pleased that two of my passions, food and public radio, had come together in one amazing day of exploration.

Posted in Product review, Restaurant Review, Uncategorized | Tagged , , , | 2 Comments

Spongeworthy?

As I’ve continued my research into baking, I find more and more elaborate, complex and interesting techniques for making bread. Each nuance, each slight variation creates a broad pallet of different textures, flavors and consistencies. Being such a novice and expecting to make mistakes early on, I’ve started with easy recipes, blanks slates with which to learn the basics. My Cousin Les just posted a very detailed comment on my page on the blog chock full of really important feedback from what he’s learned in the past couple of years as a baker. There are so many approaches to baking, I’m starting to think about this project as a lifelong pursuit rather than a year-long adventure. I may have to make a trip up to Vermont to visit Ole Cousin Les for a baking lesson. There’s so much for me to learn!

So, on to a new technique – the sponge. My earlier experiments, all starting with just yeast and water, delivered a relatively thin crust, mild flavor and a tight, fluffy crumb. Those breads were good and I’m happy with the results. But to really hit the big leagues, the sponge is the logical next step. This method produces bread with deep flavor, crunchy goodness, porous texture and moist, open crumb, the artisan bread of my dreams. A sponge starter is basically yeast, water and a little bit of flour, allowed to bloom, get frothy and sit around developing flavor. Eventually, the sponge gets mixed with a full compliment of flour and turned into bread. When the sponge is allowed to sour, you get sourdough starter, which I’ll probably experiement with next.

The last time I baked bread, put half the dough aside so I could use it as a starter. That recipe was a suggestion from my friend Brady and was the subject of my last blog – Third Time’s the Charm. The dough was quite sticky and stringy and I thought it would make an excellent biga or Italian style starter. After sitting in my fridge for a week, the original dough had doubled in size and it was extremely sticky and had a very bizzare, supernatural type appearance. I found a basic recipe on-line for bread made with a starter. It called for:

1 cup of 100-115 degree water
3/4 tsp of yeast
1 tbsp of sugar
3 1/2 cups of flour
1 tsp of salt

The yeast gets mixed together with the sugar and water, then the starter, the flour and the salt all go in and get mixed together. The dough is kneaded for 10 to 12 minutes until it becomes soft and pliable and you hear a pleasant, hollow thump when you gently pat the dough. I’m still learning how dough is supposed to feel, so this is all new to me.

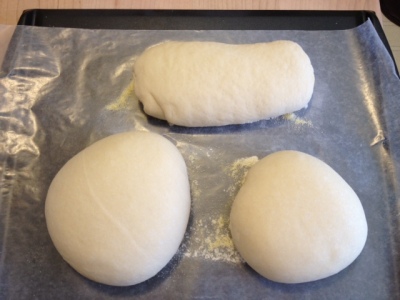
After a two-hour rise, I had a lovely full bin of soft dough, ready to be formed into loaves. I scooped it out onto my floured surface and inspected it. It had a nice elasticity and a yeasty aroma. My husband Jason joined me and together we formed the loaves. Last time I made bread, I was unable to slide the raw loaves from my cookie sheet to the pizza stone in my oven. This time I was smarter and I sprinkled cornmeal onto waxed paper, then placed the loaves on the waxed paper for it’s second rise. Ninety minutes later, they were ready to go in the 450 degree oven and they slid right off the waxed paper. I also decided to use a roasting pan of water in the bottom of the oven to create steam. Last time I attempted this, I made an egregious error in judgement and ended up with an oven full of broken glass. This time, I did it right with a metal pan.

The final product showed the fruits of my labor. Perfect bread. It made a round, hollow thumping sound when I tapped the bottom of the loaf. When I cut into the crust, it almost exploded with a symphony of crackle. It had a rich, almost sweet aroma. The crumb was moist and open, not quite as complex and full of giant holes as a baguette would be, but certainly more developed than anything I’d made before. When it was fresh, I served it with a dish of good olive oil flavored with dried oregano, flaky salt and freshly ground pepper. It tasted like heaven on earth. That night, I made spaghetti and we had the bread on the side with just a little bit of butter. Again, it was divine. The next morning, I had a slice toasted with a little bit of jam. It even toasted perfectly. Was it spongeworthy? I’d have to say….HELL YES!

Posted in Baking 101, Recipe, Uncategorized | Tagged , , , , , | Leave a comment

Third Time’s the Charm

After my second baking experiment, I felt really encouraged. I’d paid attention to the details, learned a little bit more about the chemical reactions in the baking process and as a result, my white bread loaves were fluffy and buttery, exactly as I’d imagined. A couple of weeks later, I was at a party and my friend Brady showed up with some bread he’d just baked that afternoon. It had a lovely crisp crust and a soft crumb that was perfect when dipped in olive oil. Ever the student, I began asking questions. Brady pointed me in the direction of a book called “Artisan Bread in 5 Minutes a Day“. So I did some research.

The authors of this book, Dr. Jeff Hertzberg and Zoe Francois, have created a cottage industry around this concept. In addition to the book on artisan bread, they’ve authored two other 5-minute cookbooks, one for pizza and one for healthy bread. I found numerous reviews for this recipe and by all accounts it looked like an excellent next step for my growth as a baker. This dough can be kept in the fridge for up to two weeks, so you can make fresh bread in about an hour and a half any time you want. That worked perfectly into my long term plan to make artisan bread starting with a sponge. This dough would become my future sponge.

This is a no-knead dough and while it really only takes five minutes to mix it up, it takes two to five hours for it’s first rise and 45 minutes for it’s second rise. This recipe could not be more simple and straightforward. It calls for:

1 1/2 tbsp of dry active yeast
1 1/2 tbsp of kosher salt
6 1/2 cups of baking flour
3 cups of 100-115 degree water.

Everything just gets mixed together, no yeast blooming, no kneading, the wet and dry ingredients are combined until there are no visible dry patches of flour and the whole thing gets covered and rests for anywhere from two to five hours. I mixed it all up in my special bread-rising tub and walked away. I decided to give it 3 1/2 hours, just for grins. And when I finally uncovered this dough, it was very stretchy and moist. It looked kind of luck chewing gum, partially stuck to the side of the bin and stretching into the center. The recipe instructed me to flour it, pat it down a little bit and break off grapefruit sized pieces of dough to form into loaves. It was a really soft dough, very pliable and slightly more sticky than the dough for the white bread loaves I’d made. I shaped two lovely loaves and still had enough dough leftover to make two more – that went into the fridge for my next project. I put down a layer of cornmeal on a cookie sheet, gently rested my loaves on the cornmeal and set it aside for it’s second rise of 45 minutes. Finally, I scored the surface with a sharp knife and got ready to slide these bad boys onto my pizza stone, which was preheating in a 450 degree oven. Here’s where things got a little interesting.

The instructions called for placing a roasting pan on the lower rack of the oven while it was pre-heating. When the bread goes in, the pan gets about 2 cups of water, causing instant steam, which helps develop a crusty exterior. My roasting pans were burried under a bunch of other large kitchen equipment. Have I ever mentioned my extreme lack of kitchen storage space before? It’s a nightmare, expecially when it comes to baking equipment that tends to be rather large and bulky. So, I was lazy – I didn’t go the extra mile to dig out a metal roasting pan. I took a shortcut – and that was a mistake. I used a pyrex pie plate.

The loaves had stuck to the cookie sheet, so they would not slide off onto the pizza stone. I had to wedge them free from the cookie sheet, which deflated them just a bit. I finally got them onto the pizza stone, but when I poured water into the pie plate, it shattered into a gazillion pieces in the bottom of my oven. I say it shattered – it was more like a small explosion that blew pieces of white hot broken glass all over the bottom of my oven. Sigh. I am such an idiot sometimes.

It was not fun, but I managed to get as much broken glass out of the roasting hot oven as I could. And of course I made sure no tiny shards of glass had flown up and onto my bread. All was safe, while the bread baked for 30 minutes, I swept the kitchen and cleaned up the broken glass.

The bread was delicious. The crust was not very thick, but it had a nice crackle to it. The crumb was firm and moist, but not quite elastic like french bread. We sampled it with a dish of seasoned olive oil and I have to say we were very pleased with the results. So, aside from the shattered pie plate, my third baking project was a another success. I think I’m getting the hang of this baking thing. And now I have a container of yeasty future-bread in my fridge, which means I’m committed to the next step – the sponge method!! Wish me luck.

Posted in Baking 101, Recipe, Uncategorized | Tagged , , | 5 Comments

Second Chance

My first baking experiment wasn’t exactly a failure, but it certainly didn’t yield the kind of results I was hoping for. At the end of the day, I concluded quite accurately that I just didn’t know enough about baking to know what to look for. I need more education and experience to really understand what the baking process means at the molecular level. Therefore, for my second experiment, I decided to take my brother Alan’s advice and go back to basics.

I chose plain jane, everyday, run-of-the-mill white bread as my second baking project. And I chose Julia’s basic recipe from her companion book “Baking with Julia” as a place to start. My plan was to follow her recipe explicitly, leave no steps out, be precise and resist the urge to jack things up like I normally do. I also thought it was a good idea to manage my own expectations. It’s white bread, so the final product is supposed to have a fluffy crumb and a thin crust. Knowing how this bread was supposed to turn out gave me a specific goal to shoot for.

This recipe is painfully simple. It calls for approximately 7 cups of flour, 1 tbsp of active dry yeast, 1 tbsp of sugar, 2 1/2 cups of water, 1 tbsp of salt and half a stick of butter mixed in at the end of the kneading process. I should also say that in my last blog, I didn’t talk about the kind of flour I used. All the bread recipes I’ve seen call for bread flour or all purpose flour. Bread flour has more gluten in it, which is optimum for making bread. I have committed myself to using King Arthur bread flour exclusively for all these recipes. King Arthur makes superior products and their flour is highly regarded by many bakers. Even better, the company is headquartered in Norwich, Vermont, just an hour away from my home, making this a locally produced product.

I took this baking project very seriously. I measured everything out in advance so that I would not be distracted when I started working with the dough. I made sure I had the right kind of yeast, active dry yeast. To bloom the yeast, the recipe called for the water to be between 105 and 115 degrees. In my last baking project, which called for warm water, I guessed at the water temperature. And I’m not completely certain that my yeast ever bloomed properly. But this time I used my meat thermometer to make sure the water was exactly 110 degrees. I put the dry active yeast in the bowl of my stand mixer with the exact amount of sugar and exact amount of 110 degree water and whisked it just to combine everything. Then I watched. My reward came after about five minutes. When the recipes call for yeast to “bloom”, I had no idea what that meant, until I witnessed the process myself. I saw the yeast bloom. From what looked like a little pool of wet cornmeal in the bottom of the bowl, a frothy, living substance puffed info life right before my eyes. I felt like I was watching a birth and in that moment, I understood what the chemistry is that makes bread do its thing. Yeast is alive!! And it was doing the macarena in my mixing bowl.

I followed Julia’s recipe and poured the rest of the water in the bowl. In my first baking project, I dumped all the flour into the water and turned on the mixer. The dough ended up very dry and I had to add a little more water to coax it to come together. This time, I added three cups of the flour first and started the mixer very slowly to make sure it was all combined before adding any more flour. Once the flour was all mixed into the water, I started adding more flour half a cup at a time until the dough started coming together. At the point where the dough formed a tight ball, I stopped adding flour. And in the end, it took a little over 6 1/2 cups. So, when Julia said “approximately” in her recipe, this is what she meant. I turned up the mixer and started the kneading. And from all the advice I’d been given, this dough was doing exactly what it was supposed to do. Periodically, it climbed up the dough hook and I had to stop the mixer and manipulate the dough a little bit to rearrange its position in the bowl.

After 10 minutes of kneading, the recipe called for adding the room temperature butter. Julia warned me that the dough would turn ugly, look like it was falling apart and that it might appear the butter wasn’t going to mix in, but after a few minutes it would all come together. That’s exactly what happened to me. When I turned the mixer up a notch, the butter incorporated perfectly. The finished dough from my first baking project was kind of stiff and lumpy. But this dough was soft, fluffy and smooth. My father described good bread dough as having the feel of a baby’s bottom. I don’t have any babies, so I have to guess at what their butts feel like. Perhaps I should say that a baby’s butt is supposed to feel like perfect bread dough.
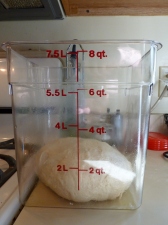
I rolled my dough into a smooth ball by bunching up the bottom and pinching it together. Then I placed it into my lightly oiled plastic bin, rolled the dough around to make sure it had a light sheen of oil all over the surface, covered the bin with cling film and set it on my stovetop for its first rise. All the bread recipes I’ve seen suggest a warm place for the dough to rise. I had my oven set at 170 degrees to create a warm spot toward the back of my stovetop. That’s where the dough sat….for a ninety minute rise. I walked away, but the dough never left my mind. I was started to obsess a little bit.

When I came back and hour later, the transformation was well under way. My dough was huge!! It needed another half an hour, but I could hardly contain my excitement. I sat at the dining room table for the next thirty minutes, clicking my fingernails on the table and watching the clock….tick, tick, tick….click, click, click…..tick, tick, tick…..rise, rise, rise. When I turned the dough out of the container onto my floured countertop after exactly ninety minutes, it was beautiful. It was soft and a little sticky, pliable but firm and when I patted it lovingly, it had kind of a pleasant hollow sound. This had to be right; I knew it in my bones. I cut the dough in half and following Julia’s directions, patted each half into a thin rectangle measuring about 9 x 12 inches. I folded each rectangle like I was folding a business letter, one end to the center and the other end over the top, pinching it together at the seam. Each rectangle fit perfectly into my 8 1/2 x 4 1/2 loaf pans, with the seams on the bottom. I covered each one with a lightly oiled piece of cling wrap and set them on the stovetop for their second rise of forty-five minutes.
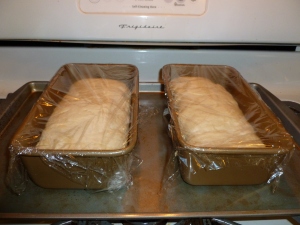
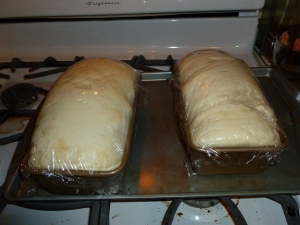
This time I was more patient and didn’t hover around the kitchen waiting for something to happen. I turned the oven up to 375 degrees and I walked away, I went downstairs and watched TV and folded laundry and did my Sunday chores. And when I came back forty five minutes later, my loaves looked perfect. According to Julia’s description, the dough should have risen over the tops of the loaf pans. That’s what mine had done. The oven was now hot and the dough was ready to bake and I was just forty minutes away from knowing if my hard work had paid off. I splashed a little water on the inside of my oven for good measure and put the bread in. This was when my patience really gave out. I had to force myself to leave the kitchen rather than sitting on the floor in front of the oven door to watch the bread bake. Luckily, the phone rang and a long conversation with my in-laws was the perfect distraction to keep me away from the kitchen. When we were talking on the phone, I started smelling that freshly baked aroma, the smell that signals home and hearth. And by the time we hung up the phone, my bread was baked and the entire house was filled with the intoxicating warm perfume of a bakery. My bread was baked and it was a sight to behold, tall and proud rising above the sides of the pan with a perfect golden-brown crust.
My plan was to use my fresh bread to make club sandwiches. While the bread was cooling, I sliced the turkey breast an tomato, cooked the bacon and washed the lettuce. When I sliced into the first loaf, my heart leapt with joy. SUCCESS!! The bread was fluffy and buttery and delicious and turned out exactly as I’d expected. I’m moving forward with this baking project with a renewed sense of confidence, armed with a little more experience and understanding. What’s next? I’m not sure, but at least now I know how to make a basic loaf of bread.

Posted in Baking 101, Recipe, Uncategorized | Tagged , , , , | 2 Comments

Making of a Baker

I have a confession to make. I don’t really know how to bake. To be accurate, I can make a wonderful batch of cookies, I’m pretty good with a pie crust and I’ve managed to learn my way around muffins and biscuits, but when it comes to complicated baking, I don’t know what I’m doing. My cakes and cupcakes are more frequently made from mixes than from scratch. And I’ve never made bread without a bread machine. This is something that has bothered me for a very long time and I’ve been muttering to friends and family about it for years. My father started baking after he retired and he got very good at it. He makes fabulous rye bread and delicious sticky buns and his challah is sublime. He keeps telling me how easy it is. Well, I’m finally fed up with my own ineptitude and excuses. If Dad can do it, so can I. This year, I’ve set a goal for myself to learn, REALLY learn, how to bake.

One of the best things about this goal is that there are so darn many resources out there for a beginner like me. Just looking through my own cookbooks, I found four books dedicated specifically to baking that I’ve barely cracked open since I got them. Julia Child’s television companion book “Baking with Julia” contains a treasure trove of useful information. And when we closed on our house a few years ago, our wonderful realtor Joan gave me a book by Martha Day that contains 400 step-by-step recipes for all kinds of baked goods. King Arthur Flour is only an hour away in Norwich, Vermont and they have classes year-round designed for every skill level. I should have no trouble finding the resources I need.

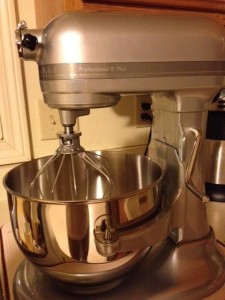
For my birthday, my husband bought me a Kitchen Aid stand mixer and a dough scraper and my brother sent me some french bread loaf pans and a plastic bin made for rising dough. Based on Julia’s suggested list of equipment, I’ve also purchased several different shapes and sizes of baking pans and I even bought a tart shell. I also picked up a couple of square pizza stones for my oven to help recreate that brick oven effect on my finished product. After years of making excuses, I’m ready to get started.

For my first baking project, I decided to pick something easy and bake a focaccio. From all that I’d read, it’s not a terribly difficult or labor intensive recipe and it only requires a single long rise and super short second rise. It affords a novice like me the opportunity to add some interesting flavors, like lemon zest, sea salt, garlic and herbs, to the top before baking. And done properly, it has a wonderful crusty texture on the outside and a chewy crumb on the inside. I also have some very good olive oil, which is perfect for bread dipping. As I researched different recipes, I felt relatively confident that I could get it right. So I got to work.

Most bread recipes begin with either a starter or the proofing of the yeast. Julia has very detailed instructions in her book for creating a starter, but it takes a couple of days to get a starter going. I haven’t gotten that far yet and this was precicely why I chose a focaccio, because it starts with the proofing of yeast instead of a bread starter. I also learned that there are several different kinds of yeast to choose from. Based on a recipe I found from Tyler Florence, I opted for rapid rise active dry yeast and followed his instructions for making this bread. I proofed it with warm water and sugar until it bubbled slightly before adding all the dry ingredients and starting the mixer.
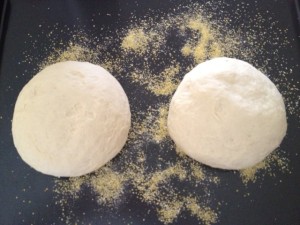
Honestly, I don’t know people made bread before the invention of the stand mixer. My mixer worked for 10 minutes on this dough and had I attempted the process by hand, my arms would probably have fallen off. Having never made bread dough before, I was kind of groping on the dark, unsure of how long to let the mixer go, what the right consistency is and when to know that it’s ready to rise. Ultimately, I just guessed. I took the dough out, balled it up nicely and placed it in an oiled bowl covered with plastic wrap. I set it on my stovetop close to where the oven vent is so it had a nice, warm place for the yeast to do it’s thing.

The recipe called for a 45 minute rise, but I gave it an hour. Lo and behold, it doubled in size! The result helped boost my confidence. I took the dough out of the bowl, patted it out to a wide oval shape and put it on a pan for a short second rise, only 15 minutes. When I came back, it had only puffed up slightly. Was that enough? Was it ready to bake? I had no idea. But I’d gone too far to turn back, this dough was headed for the oven no matter what. I dimpled it according to the recipe, brushed the whole thing with olive oil, placed garlic slivers in the dimples and sprinked the whole thing with excellent quality salt and lemon zest. Then I put my very first loaf of bread in the oven.

Thirty minutes later, it was brown and beautiful and I took it out to cool. Boy was I shocked and surprised when I cut into that focaccio. The crust was barely a crust at all, it was thin and soft. There was no glorious symphony of crackle when I gently squeezed it. The crumb had the texture of a loaf of plain white bread. There was no elasticity, no chewiness. It tasted good, but it was certainly not what I’d expected. I started retracing my steps. Maybe the rapid rise yeast wasn’t the right choice, maybe it didn’t proof long enough, maybe I didn’t knead it enough, maybe it needed more time to rise. There are so many variables in baking that it could have been any combination of the above that caused my less than stellar results. The upshot of this first experiment for me is that I really don’t know enough about baking yet to know what went wrong. That is both daunting and exiciting….I have a LOT to learn about baking bread!

Posted in Baking 101, Recipe, Uncategorized | Tagged , , , | 5 Comments